Showing posts with label In my kitchen. Show all posts

Sunday, 6 November 2011

Tempo da polenta! (Time for Polenta)

For English, please scroll down.

Questa fine settimana non è stata una delle migliori di sicuro. Ma che tempaccio! Comunque non mi lamento visto che c'è chi sta molto peggio di noi. Speriamo che il maltempo dà una tregua.

A casa nostra, si comincia a girare la polenta spesso quando comincia l'autunno. Mia suocera è una maestra di polenta :-) E' nata e vissuta in una valle bergamasca, quindi la polenta per lei è come il riso per me. Devo essere sincera, non ne vado matta. Mi stancherei se ne mangio spesso ma ogni tanto la mangio volentieri. Preferisco quasi mangiarla il giorno dopo quando diventa dura, la taglio a fette e le metto sulla piastra calda per un pò di minuti ogni lato.

Ma mia suocera sa che la polenta non la rifiuto mai se accompagnata con il sugo di funghi! Il suo sugo è F-A-V-O-L-O-S-O!!!

Per cuocere la polenta (credo che tanti di voi la sapete cucinare già), fate bollire acqua in un paiolo (o una pentola), salate e buttate giù la farina poco alla volta girando ben bene. Quando diventa omogeneo coprite il paiolo e lasciatelo sul fuoco minimo. Giratela ogni tanto. Il tempo di cottura credo dipendi dalla quantità, circa da 40-60 minuti. Non vi posso dire le quantità di acqua e farina perché mia suocera non le ha mai misurate.

Per preparare il sugo di funghi, ci occorono (per 4 persone): 30 g. di funghi porcini secchi, 1 spicchio d'aglio, 1 rametto di rosmarino, 1/2 bicchiere di olio d'oliva extra-vergine, 300 g. di pomodori freschi maturi, 1 cipolla e sale.

Tritate la cipolla, l'aglio ed il rosmarino. Rosolateli nell'olio. Aggiungete i pomodori pelati e tritati. Ora mettete i funghi (dopo averli messi a bagno per circa mezz'ora), un pò di sale e fate cuocere a fuoco basso per mezz'ora.

...e voilà!

Un piatto di polenta con il sugo di funghi, ottimo per scaldarvi in una giornata invernale :)


I'm going to introduce you, my lovely readers, "la polenta". It's made of various kinds of cereal flour, a basic dish consumed particularly in Northern Italy. In my family, we begin to cook "la polenta" often at the beginning of autumn. (It's perfect to warm your stomach.) My mom-in-law is a polenta-lover because it's her birthplace's local food. Polenta for her is equal to rice for me. Her favorite polenta is made of corn flour. If I've to be sincere, I tell you that I don't go mad with it. I have it willingly occasionally but if bores me if I have it too often.

But my mom-in-law knows how to make me eat the polenta very willingly! When she serves it with her mushroom sauce I just simply devour it all. Her mushroom sauce is really FABULOUS!

To prepare "la polenta", bring water to boil, add a little salt and then pour the flour for polenta little by little, stirring well until it becomes homogeneous. Cover the pot and leave it on lowest heat. Stir it often. Let it cook for about 40-60 minutes, the time depends on the quantity. (I can't give you the measures of water and flour because my mom-in-law never measures them! I think you can find the directions on the polenta flour package.)

To prepare the mushroom sauce, (for 4 persons) you need 30 g. of dried porcini mushrooms, 1 glove of garlic, 1 branch of rosemary, 1/2 glass of extra-virgin olive oil, 300 g. of fresh ripe tomatoes, 1 onion and salt.

Mince the onion, garlic and rosemary, then brown them in the olive oil. Add peeled and chopped ripe tomatoes into the pan. Add dried mushrooms, after being soaked for about half an hour, and a little bit of salt. Cover the pan and leave it on low heat for half an hour.

Believe me, you'll love this dish!
(please see the picture above)

Thursday, 27 October 2011

Patata dolce & Zenzero / Sweet potato & Ginger

For English, please scroll down.

Uno tra gli ingredienti che non devono mancare dal frigo di mia mamma è lo zenzero. Ha un profumo pungente ed un gradevole sapore piccantino. Nelle cucine asiatiche, lo zenzero è usato in tanti modi; per esempio a fette sul pesce al vapore, a strisce in padella con la carne, grattugiato fresco nel piatto d'insalata ed a pezzi da bollire in acqua per fare una tisana.

Mia mamma molto spesso usa i rimedi antichi per mantenersi in salute. Sono stata abituata da bambina a bere delle tisane fatte in casa per curarmi dalle tosse, raffreddore, mal di pancia, ecc. Stavolta vorrei parlare dello zenzero che ormai è diventato più conosciuto anche in Italia. Mia mamma ritiene che lo zenzero aiuta nella digestione, elimina il gonfiore nella pancia, purifica le vene e ci tiene lontano dal raffreddore. Ho cercato le informazioni da alcune fonti ed ecco qui un link dove potete consultare per avere una versione più ufficiale delle proprietà dello zenzero: http://www.lerboristeria.com/articoli/2005_06.php

Ora che le giornate cominciano ad essere fredde ed umide, mi viene in mente di bollire le patate dolci con lo zenzero come preparava mia mamma nelle giornate piovose. Stamattina ho procurato gli ingredienti da un minimarket etnico in città.

Ingredienti che ci occorono:
500 g. di patate dolci
1 pezzo di zenzero (lungo circa 10 cm)
4 cucchiai circa di zucchero di canna
800ml. circa d'acqua

Le preparazioni:
- Sbucciare le patate e lo zenzero e tagliarle a tocchetti.
- Fare bollire acqua.
- Quando l'acqua comincia a bollire, aggiungere le patate e lo zenzero che avete preparato. Lasciare bollire con coperchio semichiuso per circa 20 min. o fino che le patate sono cotte.
- Aggiungere lo zucchero a piacere. Ho usato quello di canna, se usate quello bianco l'acqua rimane chiara.
- E' pronto da servire caldo!!!


Per preparare una tisana senza patate dolci, fate bollire un pezzo di zenzero (schiacciatelo un pò prima per ottenere il gusto e l'aroma il più possibile) in una pentolina d'acqua per circa 15 min. e poi aggiungete lo zucchero o miele (che viene molto bene). 

Con questa ricetta partecipo al Weekend Herb Blogging # 307 che sta ospitando Elena del food blog Zibaldone culinario di cuil'organizzatrice italiana è Brii Briggishome. Indico qui il link della fondatrice Kalyn di Kalyn’s Kitchen e l’attuale organizzatrice Haalo, Cook (almost) anything at least once.


Sunday, 4 September 2011

What I eat

I'm back, after a long absence! In summer you feel like doing any other things than writing your blog, don't you? This morning, it was very cloudy and finally it rained! We did need some fresh air. I've a lot of thoughts to share but I'm still keeping them in my mind. I hardly find enough time to write as I'm not the only person who uses the computer. Well, the time will come.

Today, I just thought to show some of my simple but deliciuos dishes. In Italy, where I live, you rarely find a "real" Chinese menu in Chinese restaurants, as for in Thai ones. I suppose they modify the tastes, the ingredients and the way of cooking to make the dishes more similar to those of the local ones, for the reason that customers would accept them more easily. (Let me say that Italian people generally are very traditionalists.)  Yet, I personally think that both China and Thailand have much more various kinds of food to offer and it's really a pity not to demonstrate our stunning tastes and scents. The first time that my husband tried Thai food at Bangkok, I chose the dishes that worth trying, he was crying and blowing the nose while eating because of the intensely spicy tastes, but he loved them a lot and he was so satisfied. When our Italian friends wanted to try Thai dishes, I invited them and cooked the dishes the way they have to be and.....everyone of them loved the food a lot (even though they had some tear drops at the edge of their eyes when eating!!). One of my husband's friends turned back several times to have a Thai spicy soup.

Here is a combined picture of some Chinese and Thai dishes that we serve on the table in our families. I've cooked them at home.  They're all common ones.


The left row from top: Som-tum (Thai famous salad of raw papaya, I replaced papaya by carrots); Sweet and sour mixed vegetables and pork; Tom-yum-kung (thai well-known spicy soup with shrimps and mushrooms)
The right row: Steamed rice and egged pumpkins; Steamed rice and Chinese red spiced pork

Friday, 15 July 2011

Editing pictures

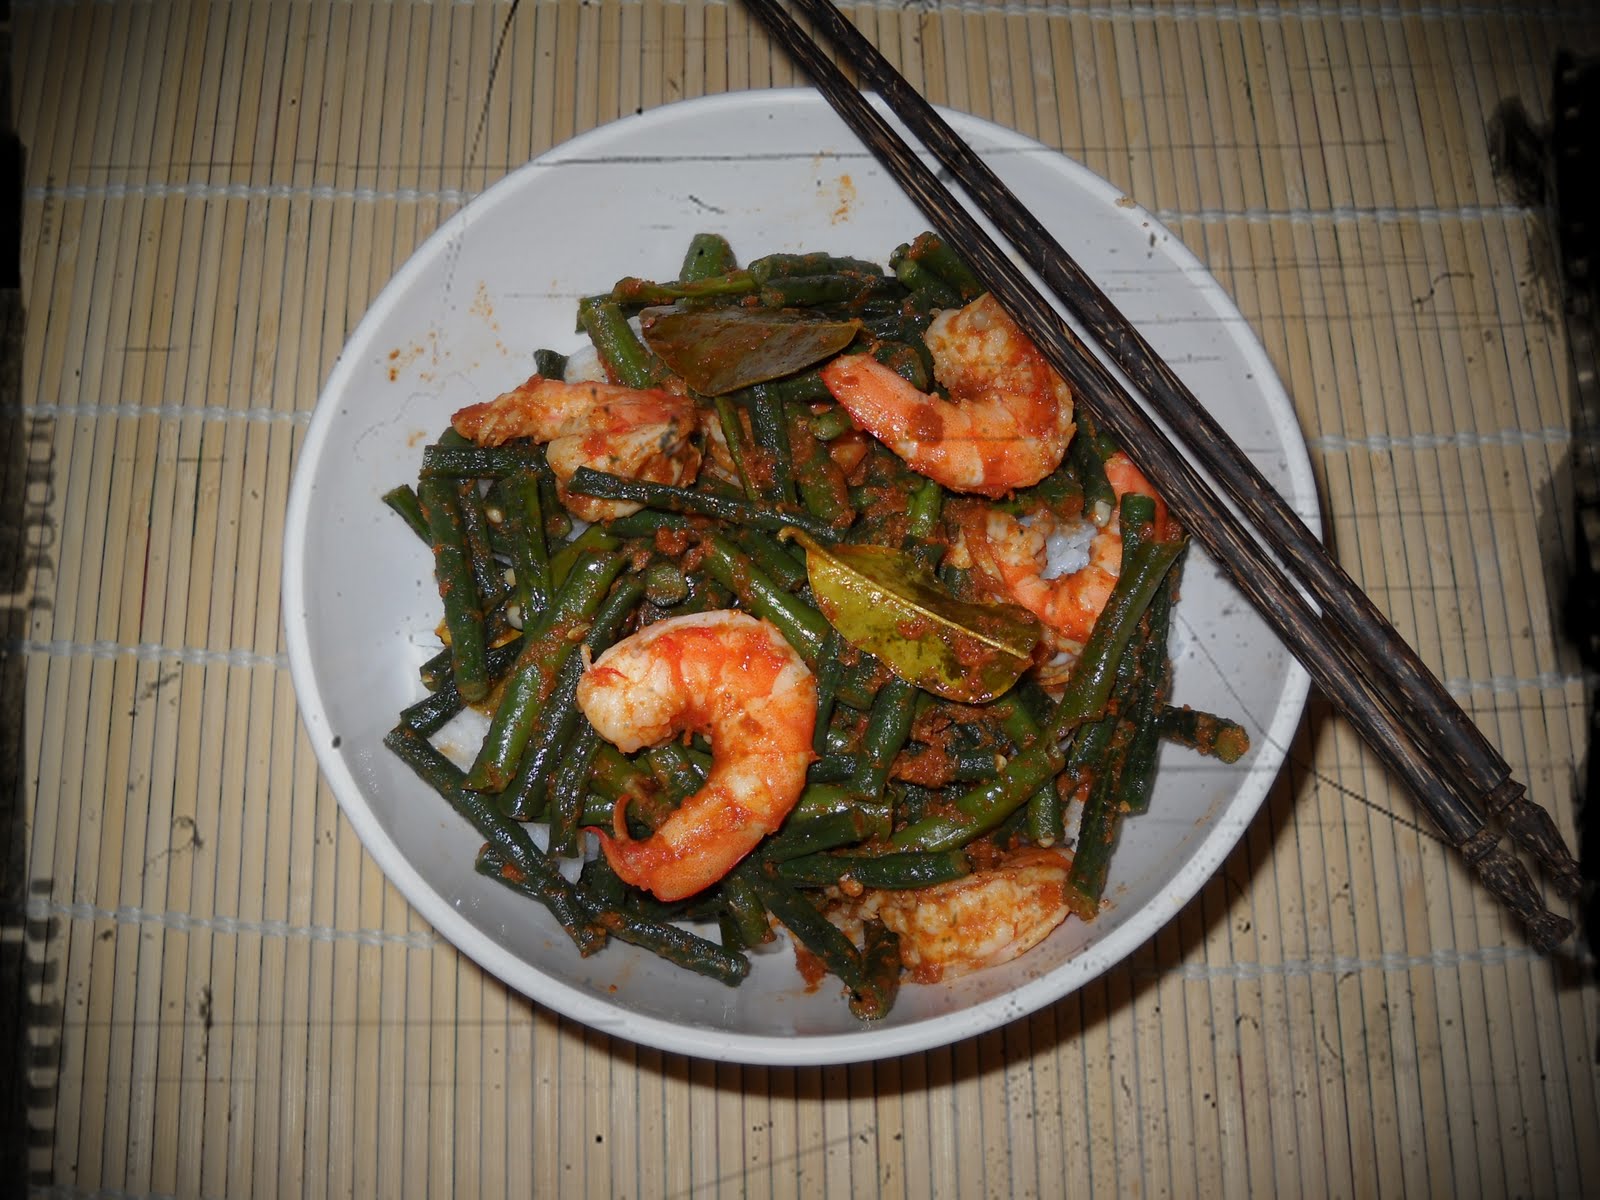
This's just for fun. I don't know why but last evening after cooking a simple dish for myself, using the organic long beans from my friend's garden, I thought of the way my daddy loves to eat. Each meal, my mom always prepared the table in this way: 1 plate,1 spoon and 1 fork for herself and her children but 1 bowl and 1 couple of sticks for her husband. My dad loves to have food from a bowl and pick the food with chinese sticks. He holds the bolw in the left hand and the sticks in the right one...as if he tasted the food better than having it from a plate and fork. My mom, me, bro and sis use the sticks only when we have noodles, never use them when we have rice.

So last evening, after thinking of my dad and his bowl of rice, I decided to have rice and the long beans & shrimps in red curry sauce (obviously cooked by meself) in a bowl and to use sticks. I just wanted to fantasized a little bit with the pictures of the meal editing them by the program photoscape. And the results are...


Wednesday, 15 June 2011

A great time with my great friends

Yesterday I really had a great time with my Thai friends. I invited them to have lunch together and to up-date all the news. The 3 lovely friends are Thai wives who have lived in Italy for longer time than me. Ther're numerous Thai women in my city, more than I ever imagined but sincerely I prefer having only some but good friends. We talked a lot and surely we had a lot of fun. My boy, who's on summer holidays, had a smaller friend to keep company. He took the occasion to play as the big brother.

The night before, I marinated the chicken breasts in coconut milk, curry powder and some other ingredients. I grilled them with my friends for the lunch. In addition, I prepared a soup with stuffed zucchini and I also let them try the salted eggs I made. Cooking our dishes and speaking our language make us feel we're home! Seeing that lately I threw myself into the cooking field, I let you see my dishes. They were superb ;-)


They brought me the cakes and a Thai dessert but I didn't take the photo. I can say that another extraordinary day of mine ended.

Wednesday, 8 June 2011

...and it's time to boil the salted eggs!!!

Yes, 3 weeks has passed and this morning I lifted the eggs out of the vases, placed them in a saucepan and covered them with water. The water began to boil, I reduced the heat a little bit and....there came one doubt. How much time would it take to cook the salted eggs??? I was completely convinced that it'd take the same time as boiling fresh eggs...but fortunately I began to doubt so firstly took a look on the internet and the website I clicked said it should take about half an hour. Really half an hour to boil some salted eggs??? I suddenly picked up the phone and call my (Thai) dear friend who had suggested me to do the eggs. She strongly confirmed that it does take more time to cook them than to cook the fresh ones. She usually let boil for about 15 min. Well...the webpage I consulted said 30 min, my friend 15 min...or it might depend on how high the flame is?? I just took a quick decision to let them boil on a medium-low heat for 20 min....

When the eggs were replaced from the saucepan and cooled down...I couldn't wait to open one of them!!! And here it is!!
II WAS PERFECTLY DONE!!!
It tasted well, quite salty ;-) I had it at lunch with a plate of stir-fry rice with veggies. I'm still ok until now, so they're not harmful to health :-P

Thursday, 19 May 2011

My first experiment on salted eggs

A bowl of rice soup and a salted egg had been my favorite breakfast ever! Here I adapted myself with the classic Italian breakfast; home-made espresso coffee and some cookies. Sometimes I really miss the breakfast prepared by my mom, especially the salted eggs which were superb! I can't imagine if these preserved eggs are eaten in some other parts of the world apart from Thailand and China! In Italy it sounds so weird.

Normally we use duck eggs but I can't find them in any supermarket. My in-laws said they never heard anybody eating duck eggs before. Well, if we eat hen's eggs, why don't we eat duck's ones? I don't know if I'll get the same result with hen's eggs, but I should try. I'm altready dreaming my favorite breakfast! Let's see in the next 3 weeks if the eggs will be eatable.

This isn't really my 1st experiment as mentioned in the topic. In the primary school I made it in the class but this's my 1st time out of school ;-D I've never preserved vegetables nor fruits, it's not my habit doing it. We rarely eat preserved food, it may be because we've fresh veggies and fruits all the year.

Monday, 2 May 2011

Pollo al curry "Massaman"

Ieri ho preparato un piatto squisito di pollo al curry che si chiama "Massaman". Questa ricetta ha origine persiano. Mi sono documentata per poter dare un'informazione corretta. Nell' antichità, da 1676 - 1688 (anni cristiani), Re Narai governò la Thailandia e scambiò il commercio con paesi come Cina, Giappone, Iran, Inghilterra ed Olanda. Le spezie persiane ebbero successo per il suo profumo ed il gusto intenso. Fu scritto addirittura una poesia dedicata al curry Massaman da un noto poeta.  E così questa ricetta fu molto diffusa nel nostro paese fino ad oggi.

Questa ricetta è adatta non solo alla carne di pollo ma anche a quella di manzo e vitello. Che cos'è il curry Massaman? Dunque, è un insieme di vari ingredienti come peperoncini secchi, scalogno, aglio, citronella, radici di coriandolo, peppe, cannella e altri ingredienti che non saprei come si chiamano in italiano, o se hanno un nome italiano. E' ovvio che preparare questa pasta di curry in un paese straniero come Italia è quasi impossibile, non si riesce a trovare tutti gli ingredienti ma è facile trovare la versione pronta da usare in vasetto o bustina nei negozi alimentari etnici. Cercate "Massaman Curry Paste", è quello giusto! Ora iniziamo!!!

Gli ingredienti (per 3-4 persone):
500 gr. di carne di pollo (vanno bene sia cosce, ali o petto tagliato in tocchetti)
50 gr. di Massaman Curry paste
1 lattina da 400ml di latte di cocco (non comprate la marca Kathay, non è buono)
         si può sostituire il latte di cocco con latte intero
1 cipolla
2-3 patate
1 tazza di arachidi bolliti (li ho sostituiti con i fagioli cotti)
2-3 cucchiai di salsa di pesce (che praticamente è l'estratto di acciuge), sostituibile con un pò di sale
1 cucchiaio di zucchero di palma, sostituibile con quello di canna
3 pezzi di tamarindo fresco (sostituibile con succo di limone)


Come preparare:
- Mettete in ammollo il tamarindo (basta poca acqua), spremetelo dopo 10 min. ed ottenerete il succo di tamarindo
- Tagliate la cipolla in 4 pezzi e tagliate le patate a tocchetti.
- Mettete la metà di latte di cocco in una pentola e scaldatela.
- Aggiungete la pasta di Curry Massaman, girate e lasciate bollire pian piano sul fuoco basso per qualche minuto.
- Mettete la carne di pollo nella pentola, mettete il coperchio e girate ogni tanto per 10 min., sempre sul fuoco basso.

- Aggiungete i pezzi di cipolla e patate, versate l'altra metà del latte di cocco, tenete il coperchio sulla pentola e girate ogni tanto.
- Dopo circa 30 min. di cottura, aggiungete i fagioli cotti (ho usato quelli nella scatola), la salsa di pesce (o sale), lo zucchero e 2 cucchiai di succo di tamarindo (oppure 1 cucchiaio del succo di limone)
- Terminate la cottura, in tutto deve cuocere pian piano per circa 1 oretta.
- Assaggiate ed aggiustare il gusto come preferite.
- Pronto da servire! Naturalmente va servito con riso cotto al vapore, ma non è male anche da fare la scarpetta con pane ;-)

Buon appetito! Con questa ricetta partecipo al "Contest Cucina Etnica" di Gianni del blog Cocogianni o cuocogianni? come fuori gara.

Saturday, 2 April 2011

Come cucinare il tofu / How to cook yummy tofu

(For English, please scroll down)


Ormai il tofu è diffuso anche nei paesi occidentali come Italia, ma a volte sento delle persone che lo hanno provato ma non lo hanno gradito. Mia suocera mi ha raccontato che anni fà (quando non c'ero ancora io) mentre doveva seguire una dieta rigorosa, ha comprato questo famoso tofu. L'ha spalmato su una fetta di pane al posto di formaggio e da quella volta non ne ha mai più comprato dato che l'ha trovato sgradevole....e ci credo!!!

Esistono molti tipi di tofu. Una mia zia thailandese, di origine cinese, vende tofu e latte di soia fatti in casa ogni mattina al mercato dove abita. Il latte di soia in commercio qui non va neanche un pò vicino a quello che bevevo da freschissimo a Bangkok. Ha un altro sapore ed altro odore.

In Asia, abbiamo tantissimi prodotti alimentari di soia. Posso dire che la soia consiste nella nostra dieta quotidiana. Stasera ho cucinato il tofu per me e mio marito. Una mia amica thailandese che mi segue anche qua aveva postato questa ricetta in spagnolo (sta studiano in Spagna) nel suo blog e così mi è venuto in mente di postarla anch'io per i miei lettori italiani : ) Io però non metto nessun tipo di carne, quindi è un piatto vegetariano (perfetto per mio marito!)

Gli ingredienti:
1 confezione di tofu
1 spicchio d'aglio
2-3 carote
1 scatola di piselli
4-5 fughi shiitake secchi (mi sono rimaste in casa solo 2)
1 cucchiaio di amido di mais
3 cucchiai di salsa di soia
un pizzico di pepe
olio vegetale

Come preparare:

1. Mettete i funghi Shiitake secchi in amollo (acqua fredda) per mezz'ora.
2. Tagliate il tofu a fette alte circa 1 cm.
3. Tagliate le carote a fette sottili ma non troppo sottili.
4. Prendete i funghi, strizzateli e tagliateli a strisce

5. Friggete il tofu (ho usato l'olio di mais) circa 3-4 min. al lato e poi lasciatelo da parte.
6. In una padella mettete poco olio (il tipo che preferite) e mettete aglio tritato. Usate il fuoco medio.
7. Unite le carote e funghi nella padella, lasciateli cuocere per circa 8-10 min. girando ogni tanto ed aggiungendo qualche cucchiaio d'acqua calda.
8. Versate i piselli nella padella, lasciate cuocere ancora per 3 min.
9. In un bicchiere mescolate 1 cucchiaio di amido di mais e 2 cucchiai d'acqua.
10. Versate l'amido di mais nella padella e lasciate cuocere ancora per un paio di minuti. Questo è per addensare l'acqua nella padella.
11. Aggiungete 3 cucchiai di salsa di soia salata ed un pizzico di pepe, mescolate e versate il contenuto sopra il tofu fritto. Ora ottenete un piatto di tofu ricco e gustoso!
Servitelo con il riso cotto al vapore come un piatto unico!

Per mio marito che non mangia cibi fritti, ho bollito il pezzo di tofu per qualche min., l'ho tagliato a fettine e poi ho versato sopra altri ingredienti. E' ottimo anche in questo modo.

Saturday, 12 March 2011

Salapao: Chinese steamed buns / bread

A couple of years ago, I bought a pack of mixed flour for "salapao" or Chinese bread from my reliable on-line food store. It was my first attempt and I wasn't so satisfied as the salapao I used to have in Thailand was softer. My husband loves those steamed Chinese bread, so I was curious to try to do it although I wasn't very convinced about the result...and I was right, the buns came out a bit too hard and sticky.

There're several kinds of salapao; assorted ones and empty ones that are called "Mantou". My husband has tried the latter and he loves it. He's never tried the assorted ones but now that he became vegetarian, he isn't going to try them for sure! The assortments of salapao can be "red pork" (a Chinese recipe of marinating pork in some spices and then grilled), chopped pork & boiled eggs and sweet cream. I like the buns with red pork the most.

After the 1st attempt, I didn't keep in mind to try it again but somehow I just got a pack of the flour again some months ago. Finally I picked it up the day before yesterday and decided to proceed it!

Well, the mixed flour I got is a kind of easy-to-do. Here's the package.


I thought to make buns with chopped pork and a boiled egg. I mixed the pork with a little bit of these ingredients: chopped garlic, coriander, chopped spring onion, soy sauce, cornstarch and a pinch of white pepper.


I placed the flour in a bowl and gradually add 1/3 cup + 2 tbsp. of water and 1/0 tsp. of vegetable oil. I mixed until just blended. Then, I transferred it onto a floured surface and kneaded the dough until smooth.


I shaped it into a long roll and divided it into around 12 pieces. I flattened each piece of dough and placed the filling at the center. then pleated the edge loosely and pressed firmly the top to close the bun.


When the buns were ready, I placed them onto grease-proof paper and arranged them in a boiling steamer. I let steam for about 15 minutes and proved that the fillings were well-cooked.


Well done!!! (I left 2 pieces empty for my hubby)


This time I've done a good job ;-) They tasted good and the bread was as soft as it had to be. Yummy!!


I'll learn to make the sweet cream filling so that my hubby can eat it too. Perhaps I may try to make some with only blended boiled eggs and some herbs. I must think of some alternatives without meat!

Tuesday, 25 January 2011

Stir-frying anything in a wok!

This evening I'd like to talk about food. I love trying various kinds of food, both Oriental and Western ones but I try to avoid too cheesy dishes and I don't prefer food based on flour such as pizza just because I feel too empty as if I'm leavened by yeast. I normally cook Thai, Chinese and Italian dishes alternately. Lately I've also learnt to make the Japanese sushi (using smoked Norwegian salmon instead of raw fish), the Vietnamese spring rolls (they're different from the Chinese fried spring rolls!), and the Corean pork roast and kimchi. My son loves Italian spaghetti and pizza, however he eats Chinese spaghetti and Japanese sushi as well. When we stayed in Thailand on holidays, fortunately he didn't have any difficulties in food.

We, Chineses and most Asians, stir-fry anything in a wok. My mother-in-law is used to see me cooking my quick-to-do dishes and she often asks: "Do you stir-fry everyghing?" and I say "Yes, I do!". This technique is very useful when you want to clean up your fridge or when you have a little bit of everything left in the fridge. This Chinese way of stir-frying is called "Chap-chai"; that means "mixed vegetables". I'm letting you see my Chap-chai dish made 2 days ago.

First of all, collect all you want to put in the wok, such as various kinds of vegetables, meat, mushrooms, ect. Wash and slice them into pieces. Begin with warming 1-2 spoons of vegetable oil and fry chopped garlic. If you have meat (chopped pork, chicken, etc) put it after the garlic. This time I didn't use any kind of meat.

Then put each kind of vegetables, one after another in the wok, on medium-high fire. Stir them quicklly. I used what I found in the fridge: spring onions, carrots, daikon, a kind of green leaves (I don't know how to call it) celery and champignon mushrooms.


Add 1 spoon of sweet soy-sauce. It's a dark and thick sauce which gives sweet flavor.


Then add about 2 spoons of clear soy-sauce which gives salty taste and at last a pinch of pepper. Sometimes I also put some coriandro. Usually I use dried Chinese mushrooms but I didn't soak them in time as I hadn't planned it before. Only 10 minutes are needed and voilà!


Serve it with hot steamed Thai rice ;-) You can use other kinds of vegetables too. Savoy cabbage is perfect in the wok! Remember not to continue cooking for much time because the ingredients should retain texture and flavor.


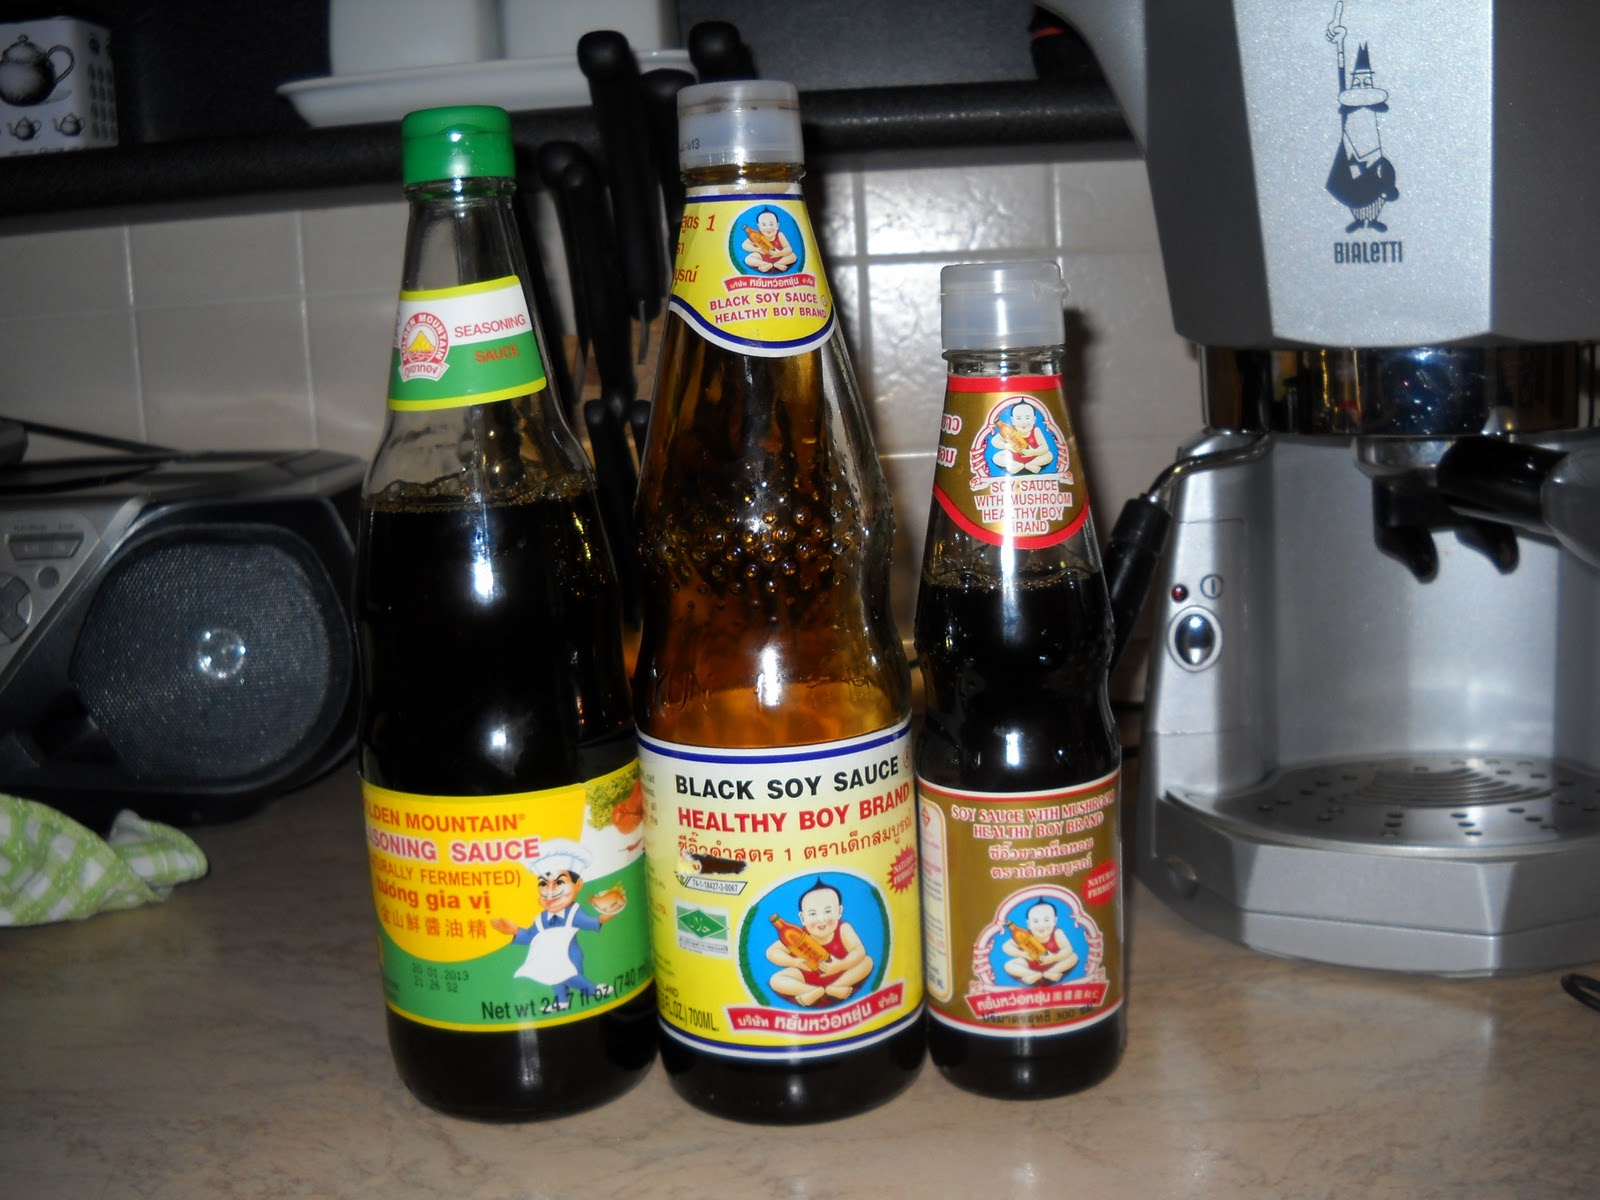
At the end, I introduce my sauces, perhaps non-Asian readers may be interested to use them. They could be found in common Asian supermarkets and on-line Asian food stores.


From left to right: Seasoning Soy Sauce, Sweet (dark) Soy Sauce and Chinese Mushroom-flavored Soy Sauce.